
This tutorial will be part of a series explaining the workflow I use to build a new Web server on the cloud, DigitalOcean's specifically, using a Linux distribution and the Apache Web Server.
I'm writing this chiefly for my own documentation, though I hope it could be handy for others. This assumes a basic knowledge in Linux and associated open source software. I started this series using the CentOS Linux distribution, but thanks to Red Hat pulling the plug on that project, I've returned to Ubuntu after a decade absence. I'm surprised about how much Canonical has improved the ease-of-installation and management, particularly around setting up and maintaining the firewall. And TBH, CentOS always kind of sucked at supporting Python...
Anyway, on to the tutorial:
Connect Your Domain Name
Once you have set up some infrastructure, which is to say you have a virtual machine (or even a real one) running an OS of some sort, the next step is to identify this machine as your own on the Internet. You need to connect your domain name to the server's Internet address (IP number). And you need to have software to serve up your pages when visitors call -- the job of the Apache Web server in this tutorial.
In this project, we are using a DigitalOcean droplet running Ubuntu (version 20.4, the "long term support [LTS] version"). Even if you don't have this particular setup, read along to get the general idea. A lot about Linux and IP networking is the same across services and distributions.
I'm assuming you already have a domain name. For this project, mine is "joabj.info" -- replace it with your own in my examples.
With the cloud provider's droplet or virtual machine, you get an IP number (i.e. 104.236.32.32). You need to let the the company that sold you the domain name (the "domain registrar") about this number.
In most cases, your cloud provider handles the duty of translating the domain name ("joabj.info") into an actual machine readable address to identify the corresponding server, a process called the Domain Name Service (DNS). But the domain registrar needs to know where your DNS manager is. And then the DNS needs to be configured.
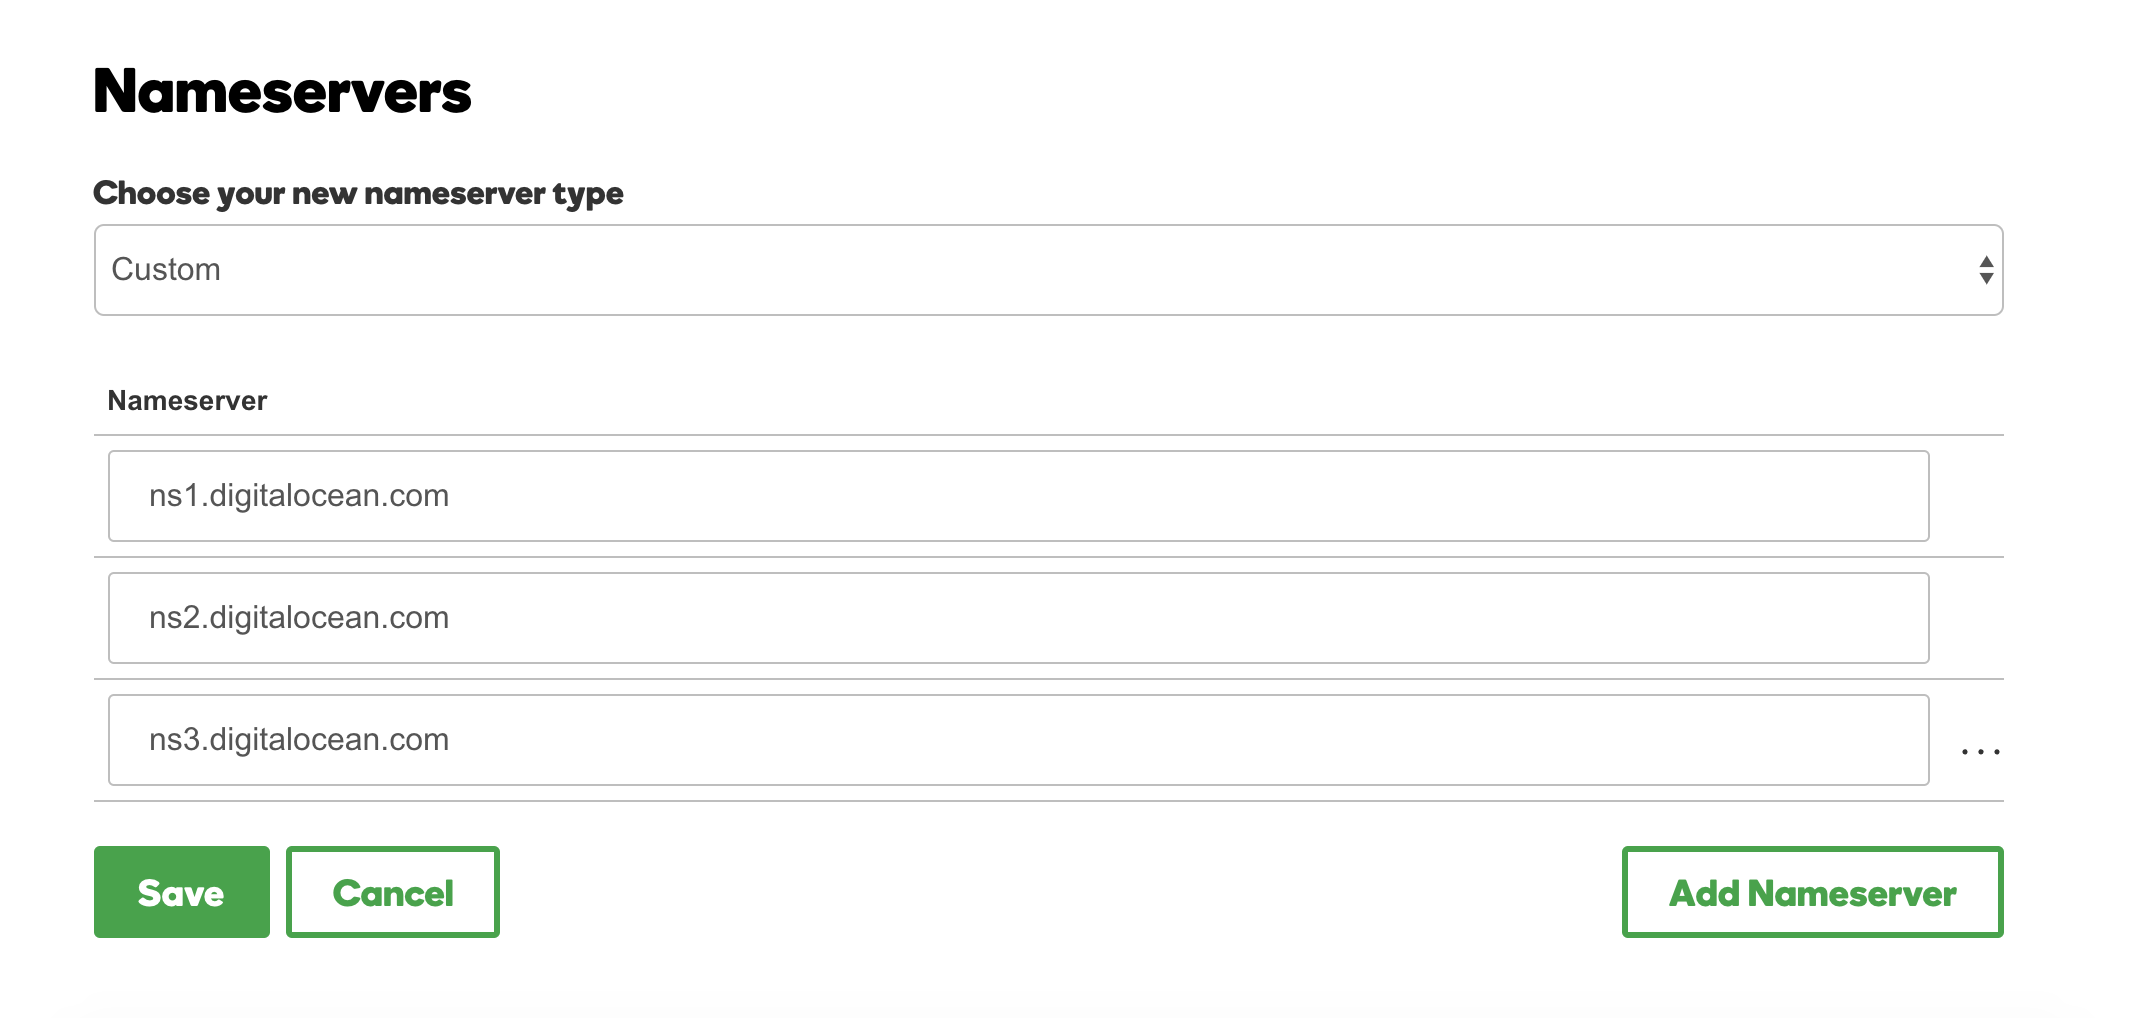
I got my domain name from GoDaddy (which is not particularly an endorsement). In this case I log into GoDaddy, find the joabj.info domain, currently under My Products, then click on the domain, and find "Manage DNS." (It's sometimes hard to find because GoDaddy uses every page as an opportunity to sell you something else.) In any case find "Nameservers" where the option is "using custom nameservers." You will want to fill these values in with the nameserver addresses provided by your cloud service. In this case:
ns1.digitalocean.com
ns2.digitalocean.com
ns3.digitalocean.com
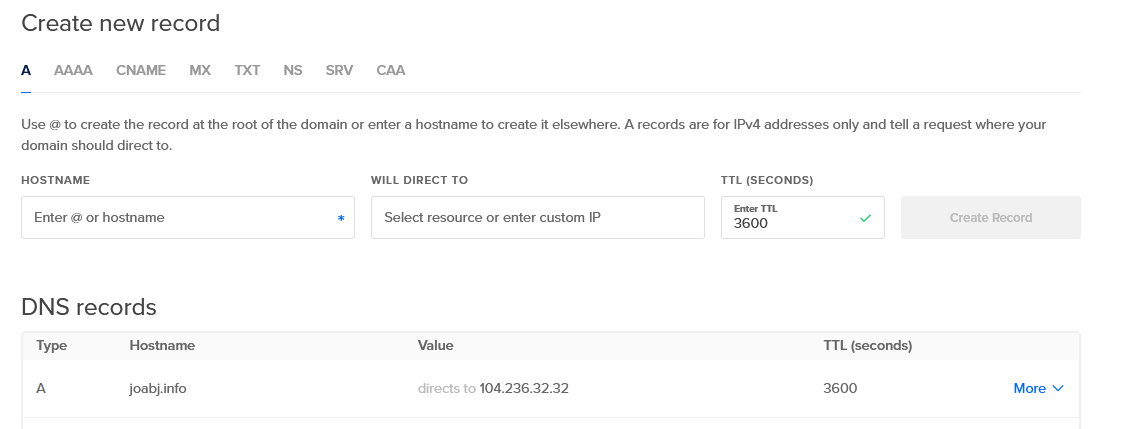
THEN! You return to your cloud service to set up the DNS records at your cloud provider. Set up your "Address" (A) record. On DigitalOcean Droplet page, right click on your droplet, and pick "Add a Domain." DigitalOcean will then attach that domain name to your droplet's IP number:
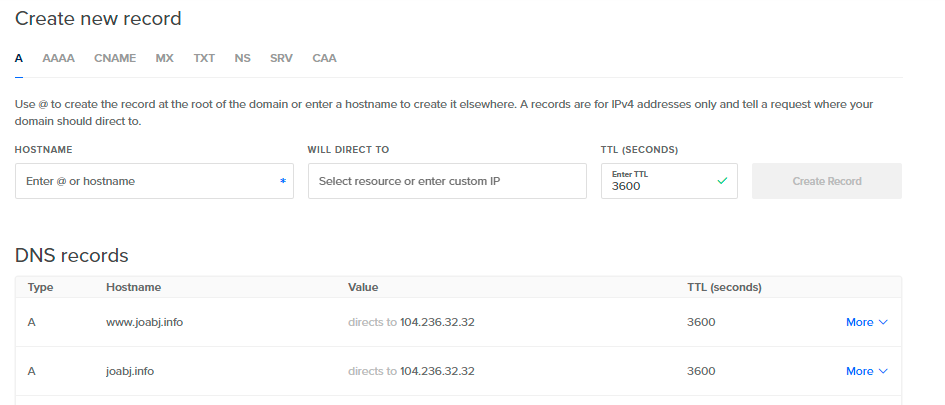
You should add both joabj.info and www.joabj.info:
This may take a few minutes to propagate the news across the Internet. You can check to see if you're on the Internet through the command line through the ping command line (or type "ping" at the Windows search bar):
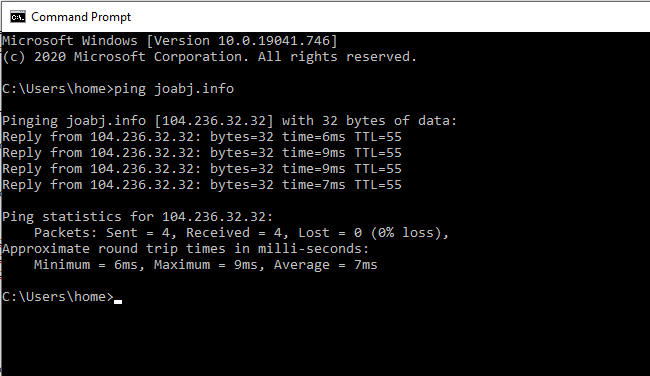
Here you can see, when the machine asks for "joabj.info" it looks for "104.236.32.32."
Mission successful! But entering "joabj.info" into a browser will still return an error page. This is because we don't have the web server software running yet. This is the next part.
Set up the Operating System for Server Duties
Before firing up the web server software, we have to do some preparatory work, including setting up a non-root user account, as well as configuring a basic firewall.
To add a user, type in the adduser command with the name of the user:
adduser Joe
You will be asked to create a password and fill in some other optional info. It's best not to do all this admin work through the
root account we've been using thus far, so we can set up this user with admin rights, allowing them to perform
administrative actions by prefacing each command with a sudo instruction (i.e. "sudo ls" for listing a directory, rather than just "ls").
To enable administrative right for the user, deploy the usermod command:
usermod -aG sudo joe
Next you need to set up a firewall. This limits the apps on the operating system that have access to the Internet. In Ubuntu, the firewall app is called UFW (short for "uncomplicated firewall"). Ubuntu's approach is a smart one in which all apps register with it when they are installed.
You can see what apps are already permitted firewall access:
ufw app list
The only one registered should by OpenSSH, which provides the command line access. You still need to enable it to ensure you can SSH in:
ufw allow OpenSSH
ufw enable
You can check what is enabled through the status list:
ufw status
More on the firewall in a bit.
Set Up Apache
I use the open source Apache HTTP software for serving web pages. By far it is the most popular web server.
Apache is not installed by default, but it is easy to download and install from Ubuntu's preferred Advanced Package Tool (apt).
The first command below updates the apt registry, and the second installs Apache:
apt update
apt install apache2
Check to see Apache registered itself on UFW:
ufw status
You are offered a number of variants on Apache: Apache (for normal, unencrypted web traffic that runs on port 80); Apache Secure (For TLS/SSL "https" encrypted traffic, on port 443); and Apache Full, which is for both unsecured port 80 traffic and secure port 443 traffic.
For now we'll enable Apache Full, though we may switch to Apache after we get encryption set up.
ufw allow 'Apache Full'
Ubuntu starts the Apache software at the end of the installation process. You can check it with this command:
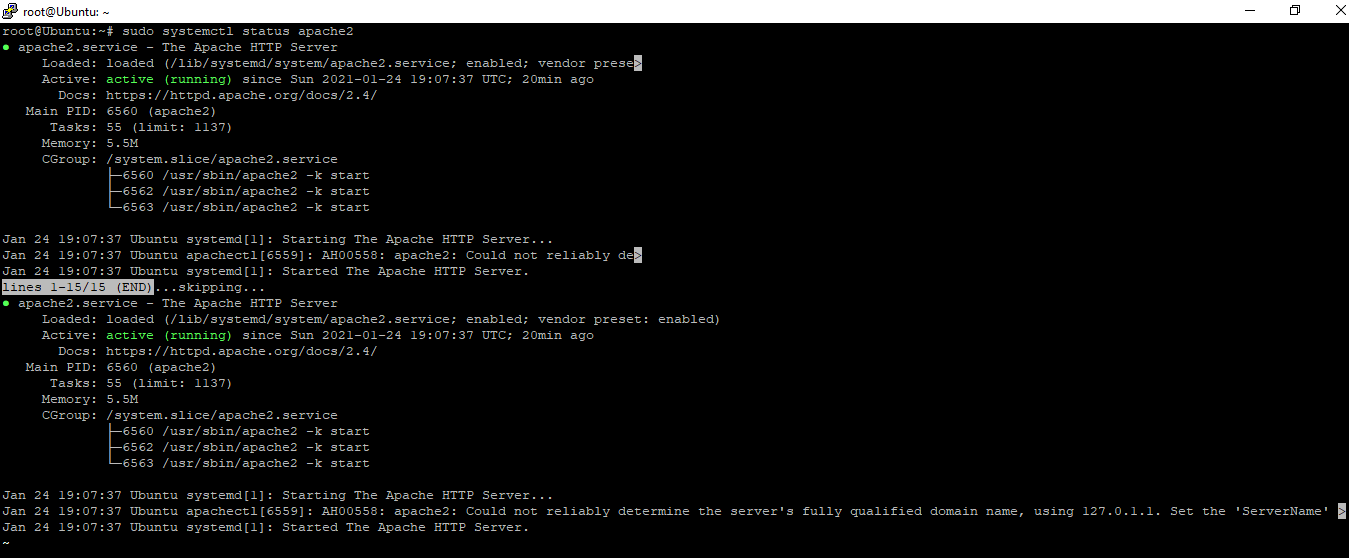
sudo systemctl status apache2
You should get some output like this:
And, Woah! Typing you domain name into a browser should get you the Ubuntu start page:
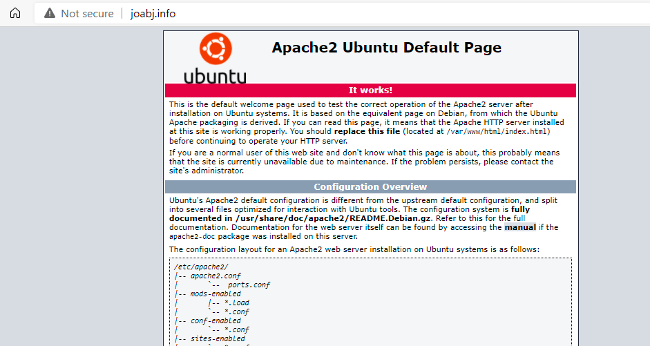
![]()
For a single site, Ubuntu takes care of a lot of the Apache configuration details. At this point you can start filling in content in the /var/www/HTML directory
Here are the Apache commands you'll need to start and stop the service:
systemctl start apache2: Starting Apache.systemctl stop apache2: Stopping Apache
systemctl restart apache2: Stopping then restarting Apache.
systemctl reload apache2: Reloading Apache so it doesn't drop connections.
Information summarized from DigitalOcean Documentation: How To Install the Apache Web Server on Ubuntu 20.04 and Initial Server Setup with Ubuntu 20.04.